
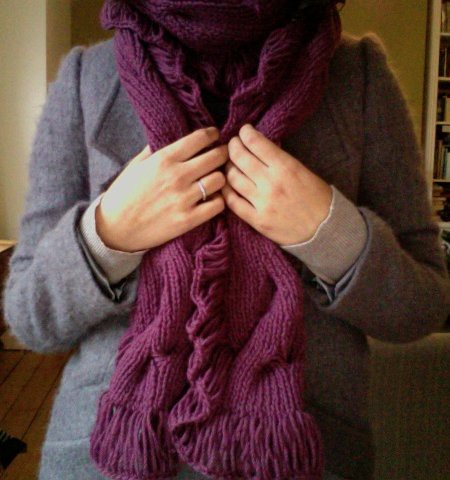
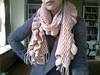
Anthropologie-Inspired Ruffled Scarf
Materials:
- Approximately 4 skeins of Cascade 220 (100% Peruvian Highland Wool/Worsted/10 ply/220yds/201m per skein)
- One set of 5.5 mm knitting needles
- Cable needle
- One 5.5 mm crochet hook
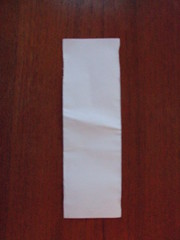
- A sheet of paper folded over itself width-wise to create a 2.5" strip
- Tapestry needle
Gauge: 25 st and 20 rows = 4" in k1, p1 ribbing
Finished Measurements:
- Scarf without crochet border: 87" x 5"
- Scarf with crochet border: 89" x 9"
Pattern notes:
C10F = Slip 10 stitches to cable needle, hold cable needle in front, work 10 stitches in (k1, p1) ribbing, work 10 stitches from cable needle in (k1, p1) ribbing
C10B = Slip 10 stitches to cable needle, hold cable needle in back, work 10 stitches in (k1, p1) ribbing, work 10 stitches from cable needle in (k1, p1) ribbing
Main Knitted Scarf Instructions:
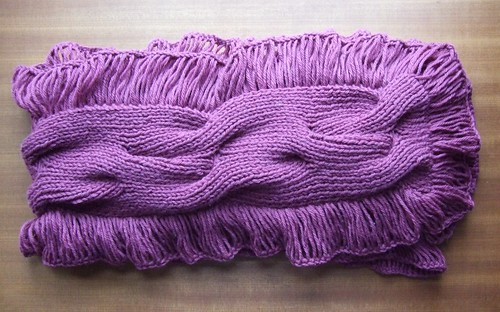
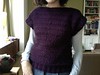
The scarf is worked in a 1x1 rib with a garter stitch border on either side. Cables appear every 15 rows. The border is worked in broomstick crochet, without twisting the loops. More detailed information below.
With 5.5 mm needles, cast on 44 stitches (I like a tubular cast on).
Row 1: slip 1, k1, (k1, p1) to last 2 stitches, k2
Repeat this row 9 times more for a total of 10 rows.
*Cable row 1: slip 1, k1, (C10F) twice, k2
Repeat row 1 14 times
Cable row 2: sl1, k1, work 10 stitches in (k1, p1) ribbing, C10B, work 10 stitches in (k1, p1) ribbing, k2
Repeat row 1 14 times.*
Work from * to * 9 times
Repeat Cable Row 1
Repeat Row 1 14 times
Repeat Cable Row 2
Repeat Row 1 10 times
Bind off.
Crochet Ruffle Border Instructions:
If you haven't done broomstick crochet before, I suggest that you check out any of the youtube videos that give a visualisation of how to do it. It is really easy, but not unless someone shows you how it's done first. You may notice that the loops are twisted together in these videos, however in this version, you will not twist the loops. You may also notice that in these videos, crocheters often use something to hold the loops as they go around. I just used a strip of folded paper, described below.
Take a sheet of A4 or letter-sized paper and fold it width-wise to create a 2.5" wide strip - you will use this to place the crochet loops on to create uniform-sized loops as you go around. Don't worry when there isn't enough space on the strip to hold the loops you are creating; once they start falling off the end of the strip, they will stay uniform in size. You just need to keep the most recent loops on the strip so they don't pull and change in size. You could use a ruler or a piece of cardboard of the same size if you like.
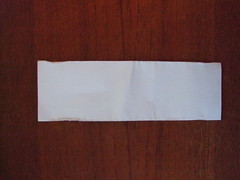
With 5.5 mm crochet hook,start at one corner of the scarf (it doesn't matter which side of the scarf you work from, as it is reversible). Insert the hook into a knit border stitch and draw up a loop. Place the loop on the strip (the strip should be turned horizontally now, as in the photo below.
Continue around the scarf, drawing up a loop for each knitted stitch along the short edge of the scarf, and along each row of the long edge of the scarf, placing the loops on the strip, and moving the strip along as you go. Once you have drawn up these loops around the edges of the entire scarf, single crochet at the top of each loop all the way around. Do not twist the loops. This will secure all the loops together around the scarf. Try to lay the scarf out completely flat as you do this, so that the single crochet stitches are all in approximately the same place on each loop. You will also want to watch out that you don't miss any loops as they can sometimes get lost - check both sides of the scarf every now and then to make sure you haven't missed any. Once you have single crocheted around the scarf in each loop, slip stitch to join the last stitch made to the first stitch. Fasten off and weave in ends.
Okay, so I think that's it! If you find any mistakes in the pattern (especially as I wrote it down from memory, rather than as I knit it), please feel free to let me know!


14 comments:
I'm so happy you wrote up the pattern! I can't wait to try it out...will be as soon as I get two other projects off the needles, hopefully by the week's end :-)
~Nonaofsav on Ravelry
Very Nice of you! I might eventually make it one day. So much in my queue...
Have a great day!
Ah that is gorgeous! I especially love the crocheted ruffle.
It's lovely ~ Thanks for you pattern notes!!
Such a beautiful pattern. Thank you for sharing it ! I can't wait to try it.
Hi! I am trying your scarf and I wanted some clarification... row 1, if repeated as written, makes a kind of basket weave pattern. Is it supposed to be reversed so it is a normal rib? It says that it has a garter stitch border that I don't see in the photographs. Thanks! It looks lovely.
Ooh, I think I was doing something wrong...makes sense now that I started again!
Oh I am glad you figured it out! If you have any further problems, please feel free to ask!
Hi!! I'm trying to look up the broomstick crochet and I keep getting videos of broomstick lace. It doesn't really look like what you did. Could you post some links that you used to demonstrate the broomstick crochet you used for the ruffle border? Thanks!!
Hi Cocou,
The border IS actually broomstick lace, but without twisting the stitches. The videos just give you and idea about how you pull up the stitches and then "put them on hold" until you go back around the scarf and secure the loops with single crochet stitches. If you read my instructions about the border, you might not even need the videos, it really is just drawing up loops in each stitch around the edges of the scarf, putting the loops on hold on the piece of paper or cardboard and then coming back around the scarf and securing each loop individually with a single crochet stitch. I hope this helps! If not, just let me know and I'll see if I can explain it better!
Love this pattern! Although, having difficulty with the 1st cable row. Here's what I did:
1. I slipped one, knitted one,
2. slipped 10 onto the cable needle,
3. knitted 10 from the needle
4. knitted the remaining 10 on the cable.
5. Slipped an additional 10 on the cable
6. Knitted 10 from the needle
7. Knitted 10 from the cable
In the next row, I get a big hole. I'm SURE I'm doing something right. Could you clarify?
Thanks!
Hi Nancy,
Off the top of my head it seems to me you need to pull the stitches tighter when you knit the first couple of stitches off the cable needle. That should tighten the holes up!
I hope that helps! If not, do let me know.
Meghan
Hi -
My name is Bethany Marcello, and I write for the yet-to-be-launched Craftfoxes.com - a crafting and social networking site.We're putting together some great stuff for our upcoming launch, featuring everything from quilting to sewing to crafting and baking.
Our editorial intern came across this picture and was wondering if you would grant us permission to use it? We'd give you a link to your site.
Thanks for your consideration!
Bethany Marcello
craftsintern@gmail.com
http://craftfoxes.com
http://www.facebook.com/group.php?gid=15312551941#!/pages/CraftFoxes/153289901371436
http://twitter.com/craftfoxes
I think the broomstick crochet videos can actually make it seem more confusing than it is -- this pattern just has you pull loops of yarn using a crochet needle and hold them with the paper -- it's actually much simpler than the videos that have you do a single crochet as well. I'm looking forward to finishing and wearing!
Post a Comment